
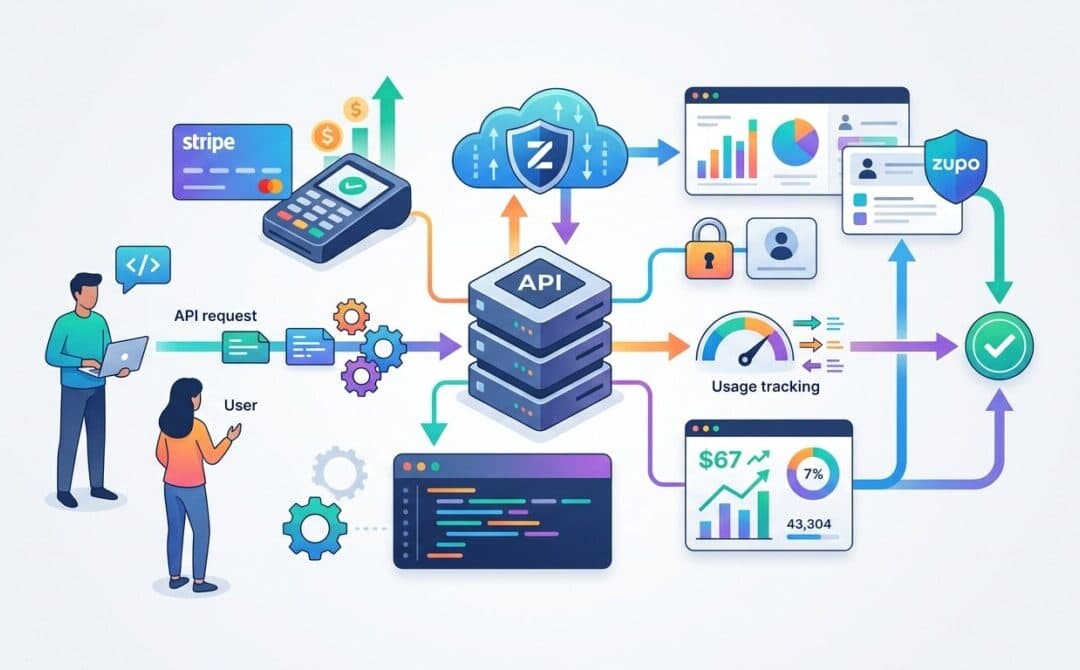
Creating a pay-per-use API can be a powerful way to monetize your services. In a recent video, Web Dev Cody walks through the process of setting up a professional API with a paywall using Next.js, Stripe, and Zupo. This guide summarizes the key steps and tools used in the video to help you build your own API with a usage-based billing system.
Why Build a Pay-Per-Use API?
Pay-per-use APIs are increasingly popular among developers and companies. Platforms like AWS and OpenAI use this model to charge users based on their API usage. By implementing a similar system, you can provide value to your users while generating revenue based on the services they consume.
Key Components of the Pay-Per-Use API
To create a pay-per-use API, you’ll need the following components:
- Next.js: Used for building the frontend application where users can log in and subscribe to your API.
- Auth0: Handles user authentication, allowing users to log in securely.
- Stripe: Manages subscriptions and tracks API usage for billing purposes.
- Zupo: An API Gateway that simplifies authentication, rate limiting, and usage tracking while providing a developer portal for your API.
Step-by-Step Setup
1. Set Up the Frontend with Next.js
Start by creating a Next.js application. This will serve as the frontend for your API. Users will log in and subscribe to your API through this interface. Use Auth0 for authentication, allowing users to sign in with their Google accounts or other methods.
2. Configure Stripe for Billing
In Stripe, create a product with a usage-based pricing model. For example, you can charge $0.01 per API request. Use Stripe’s pricing table to display subscription options on your frontend. Once a user subscribes, their email is stored in Stripe, and their usage is tracked for billing at the end of the month.
3. Use Zupo as Your API Gateway
Zupo acts as an API Gateway, providing features like authentication, rate limiting, and analytics. It also includes a developer portal where users can generate API keys, view documentation, and test endpoints. Zupo integrates seamlessly with Auth0 and Stripe, making it easier to manage your pay-per-use API.
4. Implement API Key Management
Allow users to generate, rotate, and delete API keys through the Zupo developer portal or your frontend application. These keys are used to authenticate API requests, and Zupo tracks usage for each key to update Stripe accordingly.
5. Add Custom Functionality
In the video, Cody demonstrates wrapping OpenAI’s DALL-E API with custom functionality. By using Zupo’s routing and middleware features, you can add unique features to your API requests, such as applying a specific style to generated images. This customization adds value to your API and differentiates it from direct access to third-party APIs.
Benefits of Using Zupo
Zupo simplifies many aspects of API development:
- Authentication: Easily integrate with Auth0 to secure your API.
- Rate Limiting: Prevent abuse by limiting the number of requests per user.
- Developer Portal: Automatically generate documentation and provide a user-friendly interface for API testing and key management.
- Edge Deployment: Deploy your API on the edge for low-latency responses.
Conclusion
Building a pay-per-use API is a great way to monetize your services while providing value to your users. By combining Next.js, Stripe, Auth0, and Zupo, you can create a professional and scalable API with minimal effort. Whether you’re wrapping an existing API like OpenAI’s DALL-E or building your own, this setup provides the tools you need to succeed.